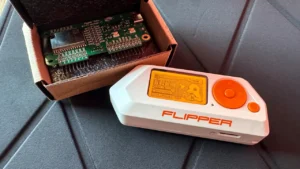
Hey there, tech enthusiasts! I’m excited to share my latest project: transforming an old Raspberry Pi 4 into a fully functional Network Attached Storage (NAS) system. This journey setting up everything via SSH was both fun and rewarding, and I hope my experience inspires you to embark on your own DIY tech adventures.
1. The Spark of Inspiration: It all started when I stumbled upon my old Raspberry Pi 4, gathering dust in a drawer. The Raspberry Pi, known for its versatility and affordability, had been a faithful companion in many other projects. This time, I wanted to take on something I hadn’t tried before – building a NAS.
2. The Plan: I decided to convert my Raspberry Pi 4 into a NAS for several reasons: cost-effectiveness, the educational experience, and the sheer joy of repurposing old tech. The goal was to create a central storage solution for my home network, allowing for easy access to files, media streaming, and data backups from every device.
3. Gathering the Essentials: Before diving in, I needed to gather a few essential components:
- Raspberry Pi 4
- SD Card (for the operating system)
- External hard drives (for storage)
- A reliable power supply
- Network cables and a router connection
- Some basic knowledge of Linux and SSH
4. Setting Up the System: The first step was to install an operating system. I chose Raspberry Pi OS lite for its ease of use and community support. After flashing the OS onto the SD card, I booted up the Raspberry Pi and configured the basics like network settings and user accounts.
5. Configuring the NAS Software: For the NAS functionality, I explored several options like OpenMediaVault and Samba. Eventually, I settled on OpenMediaVault (OMV) for its user-friendly interface and robust features. Installing OMV involved running a few commands in the terminal and then configuring the software through its web interface.
6. Connecting the Storage: The external hard drives were connected via USB. I formatted them and set up a RAID array for redundancy. This was a critical step to ensure data protection and reliability.
7. Fine-Tuning and Testing: With everything connected and configured, I spent time fine-tuning the setup. This included setting up user permissions, network shares, and testing different applications like media servers (Plex, for example) and backup tools.
8. Challenges and Learning: The journey wasn’t without challenges. I encountered issues like power supply limitations, software glitches, and network configuration puzzles. Each problem was an opportunity to learn more about the Raspberry Pi, NAS systems, and network management.
9. The Reward: The result was incredibly satisfying – a fully functional, efficient NAS system built from an old Raspberry Pi 4. It now serves as a central hub for all my storage needs, streaming media, and backing up important data.
10. Conclusion: This project was a fantastic blend of learning, problem-solving, and repurposing old technology. It’s a testament to the Raspberry Pi’s capabilities and the power of DIY spirit. If you have an old Raspberry Pi lying around, consider giving it new life as a NAS – the experience is thoroughly rewarding!
11. Future Plans: Looking ahead, I plan to explore additional features like remote access, more advanced RAID configurations, and integrating cloud storage solutions.
Happy DIY-ing!


What do you think?
It is nice to know your opinion. Leave a comment.